You turn on the shower expecting a refreshing start to your morning, but instead, you step out with dry skin and dull hair. This common frustration often stems from high levels of dissolved minerals flowing through your household plumbing. Learning how to test my water hardness helps you identify the root cause of these daily annoyances and protect your home infrastructure.
Hard water contains increased concentrations of calcium and magnesium picked up from underground soil and rock. These minerals create a variety of costly problems across your plumbing fixtures and major appliances over time, often resulting in significant mineral buildup.
Knowing your specific mineral concentration allows you to choose the right treatment system for your property. While you can measure these mineral levels using several different methods ranging from simple kitchen tricks to professional laboratory analysis, partnering with an expert team like Water-Logix guarantees a complete diagnostic breakdown. Let us explore the most effective ways to evaluate your home water supply accurately using a water hardness test.
Signs You Have Hard Water
Before you purchase any testing equipment, your home usually provides several visual clues about your water quality. Have you ever wondered why your new showerhead clogs so quickly after installation? You will likely notice a stubborn white, chalky residue, known as limescale, forming around your faucets that requires heavy scrubbing to remove completely. If you are experiencing these issues, scheduling professional water testing in Lansdale can pinpoint exactly how severe your home’s mineral saturation is.
Your appliances also suffer significantly when processing high concentrations of calcium and magnesium daily. Dishwashers leave cloudy spots on your glassware, while washing machines fail to clean your clothes thoroughly. Over time, these mineral deposits build up inside your water heater and reduce its overall energy efficiency, leading to higher utility costs.
Personal grooming becomes another major pain point for families dealing with untreated municipal or well water. Soap struggles to lather properly, forcing you to use twice as much product just to get clean. The remaining soap scum clings to your skin and hair, leading to persistent dryness and irritation that hard water testing can help confirm.
How to Test My Water Hardness with the Simple DIY Soap Suds Method
If you suspect a mineral problem, you can perform a basic evaluation using items already in your kitchen. The soap suds test provides a quick, visual confirmation of hardness without requiring any specialized scientific equipment, making it a popular DIY water test. While this method lacks precise numerical data, it offers a great starting point for homeowners concerned about their water quality.
You will need a clean, clear plastic bottle with a tight-fitting cap and some basic liquid dish soap. Make certain you select a pure liquid soap rather than a detergent, as detergents contain additives that alter the results. Fill the bottle roughly one-third full with cold tap water straight from your kitchen sink to begin the process.
Steps for a Quick Hard Water Testing Soap Suds Check
- Add the Liquid Soap: Squeeze five to ten drops of pure liquid dish soap directly into the water bottle. Tip: Avoid using colored or heavily scented soaps, as they can obscure the water clarity.
- Shake the Bottle Vigorously: Cap the bottle tightly and shake it forcefully up and down for about ten to fifteen seconds.
- Observe the Results: Look closely at the suds formation and check the water clarity below the foam layer.
Once you add the soap and shake the bottle, the resulting foam tells you exactly what you need to know. Soft water produces a thick, fluffy layer of bubbles that sits on top of perfectly clear water. High mineral content prevents bubbles from forming, leaving you with cloudy water and virtually no suds at all, indicating a need for a professional solution.
Using a Water Hardness Test Kit and Strips for Quick Results at Home
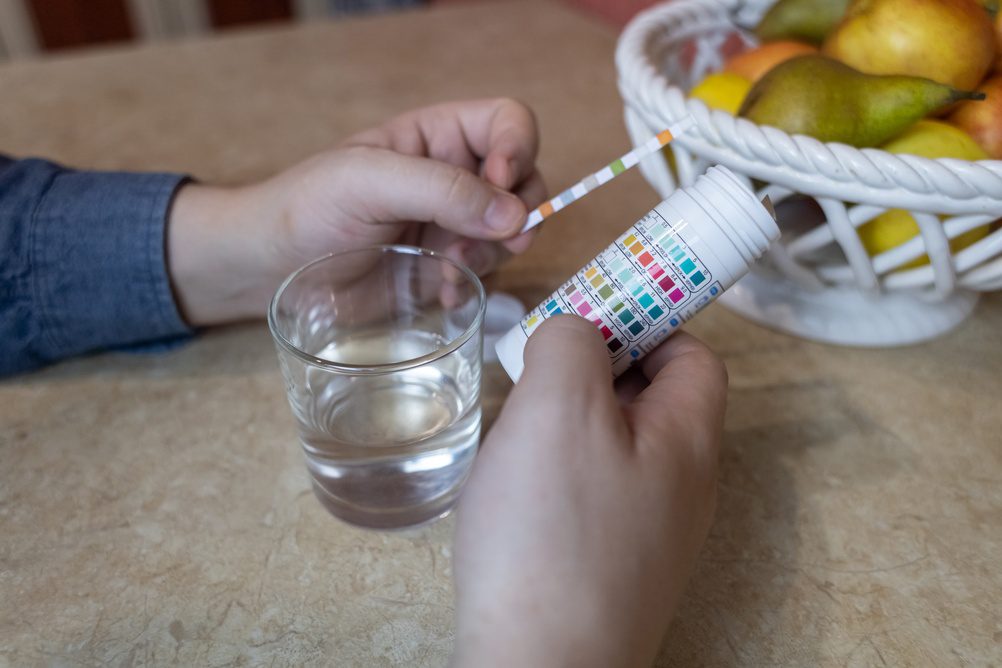
For a more definitive answer, you can purchase a water hardness test kit containing paper strips from any local hardware store or online retailer. These small strips contain specialized chemical pads that change color based on the mineral concentration in your water. They represent the most popular testing method because they combine affordability with immediate, readable results.
To use a test strip, simply dip the chemical pad into a glass of cold tap water for a few seconds. Remove the strip and wait the specific amount of time indicated by the manufacturer, which usually takes about fifteen seconds. The pad will transition from its original color to a shade of red, purple, or green depending on the brand and mineral levels.
Once the color fully develops, compare the strip to the printed chart included on the product packaging. The chart translates the specific color shade into a numerical value, typically measured in parts per million or grains per gallon. This number helps you determine exactly how hard your water is compared to national averages and local standards.
Liquid Titration Kits for Accurate Water Hardness Levels and Precise Measurements
If you need precise measurements to calibrate a water softener, a liquid titration kit is your best bet. While it takes a little more effort than a simple paper strip, professional plumbers and water purification experts rely on these kits because they offer laboratory-grade accuracy at a reasonable price.
How It Works
A standard kit includes a small plastic measuring vial and a bottle of chemical reagent drops. The process is simple:
- Fill the vial: Fill the testing vial to the indicated line with your untreated tap water.
- Add the reagent: Add the liquid reagent one drop at a time, swirling the vial gently after each drop.
- Watch for the color change: Keep adding drops until the water completely changes color (this is called the “endpoint”).
Calculating Your Hardness
Count every single drop you add. The total number of drops directly correlates to your water’s mineral concentration.
Example: If the water changes color on the 7th drop, your water has 7 grains per gallon (gpg) of hardness.
Knowing this exact number allows you to program water treatment equipment for optimal efficiency, saving you money on both salt and water.
Checking Your Local Consumer Confidence Report for Municipal Water Quality Data
If you receive water from a municipal supply, you might not even need to run a water hardness test yourself. The Environmental Protection Agency requires all public water suppliers to provide customers with an annual Consumer Confidence Report. This public document details the exact chemical makeup of your local water, including the average calcium and magnesium levels.
You can usually find this report posted directly on your city or county government website. Simply search for your local water utility provider followed by the phrase “water quality report” to locate the current data. Some municipalities still mail physical copies of this document to residents alongside their monthly utility bills for easy access.
Keep in mind that municipal water quality fluctuates slightly throughout the year based on the source and seasonal weather patterns. The numbers published in the official report represent an average taken across the entire distribution network. If you live far from the treatment plant, your personal tap water might test slightly different from the published averages, necessitating a home water hardness test.
Interpreting Your Water Hardness Test Results: Grains Per Gallon and PPM Explained
Once you complete your testing, you need to understand what the numbers actually mean for your home plumbing. In the United States, water professionals measure mineral concentration in either parts per million (PPM) or grains per gallon (GPG). One grain per gallon equals approximately 17.1 parts per million, making it easy to convert between the two scales.
| Hardness Classification | Grains Per Gallon (GPG) | Parts Per Million (PPM) | Action Required |
| Soft | Less than 1.0 | Less than 17.1 | None required |
| Slightly Hard | 1.0 – 3.5 | 17.1 – 60.0 | Rarely causes plumbing issues |
| Moderately Hard | 3.5 – 7.0 | 60.0 – 120.0 | Visible mineral deposits and scale begin |
| Hard | 7.0 – 10.5 | 120.0 – 180.0 | Significantly impacts appliance lifespan |
| Very Hard | Above 10.5 | Above 180.0 | Demands immediate attention |
Professional Laboratory Analysis for Well Water Quality and Contaminant Testing
Homeowners relying on private wells should consider sending their water samples to a certified, independent laboratory for complete analysis. While DIY kits accurately measure calcium and magnesium, they cannot detect dangerous contaminants like lead, arsenic, iron, or harmful bacteria. As part of their suite of filtration services, the specialists at Water-Logix offer professional, lab-grade diagnostics to provide a complete safety profile of your drinking water alongside basic mineral counts.
The testing process begins by ordering a collection kit from a state-certified water testing facility. They will mail you sterilized sample bottles and detailed instructions on how to collect the water without contaminating the sample. You must carefully pack the filled bottles on ice and ship them back to the laboratory overnight for processing.
Within a few weeks, the laboratory will send you a highly detailed report outlining every substance detected in your well. This data helps you design a complete home filtration strategy rather than just addressing the mineral buildup. You can find a list of certified testing laboratories through your state department of environmental protection to guarantee accuracy.
Choosing the Best Water Treatment System and Water Softener for Your Home
After confirming your high mineral levels, you can explore various treatment options to protect your plumbing infrastructure. Are you tired of scrubbing chalky residue off your kitchen sink every single weekend? Traditional ion-exchange water softeners remain the most popular and effective solution for completely removing calcium and magnesium.
Investing in a premium water softener system in Souderton makes sure your home is outfitted with advanced equipment designed to handle the toughest local mineral loads. If you prefer to avoid adding sodium to your diet, salt-free water conditioners offer an alternative approach to mineral management. These systems do not actually remove the calcium, but they alter the chemical structure of the minerals so they cannot stick to pipes. While conditioners prevent scale buildup effectively, they will not fix issues related to poor soap lathering or dry skin.
You should consult with the certified specialists at Water-Logix to discuss which treatment system best fits your test results and budget. Their team can evaluate your household water usage, review your testing data, and recommend the ideal equipment size. Installing the correct water softener system permanently eliminates the frustrations of scale buildup, spotty dishes, and irritated skin caused by hard water.
Ready for Perfect Water? Trust the Experts at Water-Logix
Taking the time to evaluate your tap water empowers you to make informed decisions about your home maintenance. Whether you shake up some dish soap or perform a precise liquid titration, testing provides valuable insight into your plumbing health. You no longer have to guess why your showerhead keeps clogging or why your skin feels so dry after bathing.
Don’t let hard water ruin your appliances, dry out your skin, or cost you thousands in plumbing repairs. Backed by years of industry-leading expertise, Water-Logix offers water testing, custom water softening systems, and advanced filtration services customized to your home’s unique needs. Contact Water-Logix today to schedule a professional water test.