Reverse osmosis systems are a reliable solution for ensuring your household has access to clean, purified water. However, like any water filtration system, regular cleaning and maintenance are essential to keep it functioning effectively and to extend its lifespan. If you’re wondering how to clean a reverse osmosis system, this guide will walk you through every step, ensuring your system continues delivering pure water for years to come. Let’s dive into the details and simplify the process of maintaining your reverse osmosis system.
How to Clean a Reverse Osmosis System
Cleaning a reverse osmosis (RO) system is essential for maintaining water purity and preventing contamination buildup. The process involves flushing out impurities, sanitizing components, and ensuring the system is free from harmful bacteria or mineral deposits. Here’s a step-by-step guide on how to clean a reverse osmosis system:
1. Prepare for Cleaning
- Turn Off the Water Supply: Shut off the main water line to prevent water from entering the system during cleaning.
- Empty the RO Tank: Open the faucet connected to your RO system to drain all the water from the storage tank.
- Disconnect the System: Detach the RO unit from its connections, including the water supply and drain line. Place it in an accessible location for cleaning.
2. Gather Your Cleaning Supplies
You’ll need:
- RO system sanitizer or unscented household bleach.
- Soft cleaning cloths or sponges.
- A bucket for cleaning solution preparation.
- Clean, filtered water for rinsing.
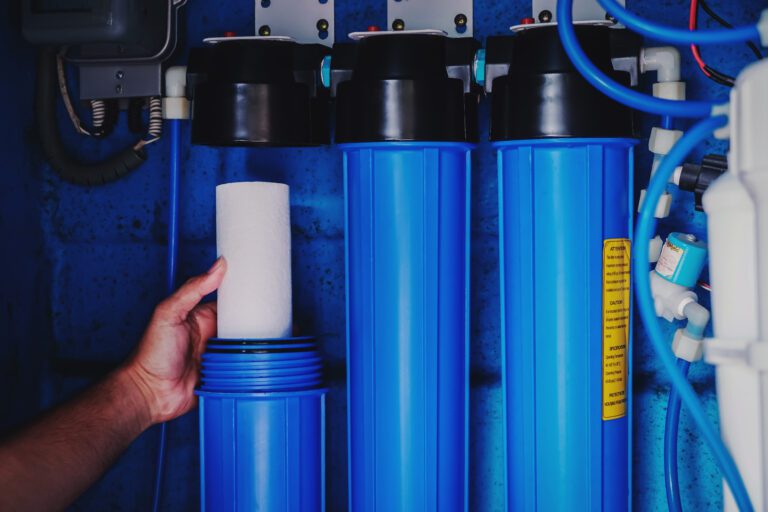
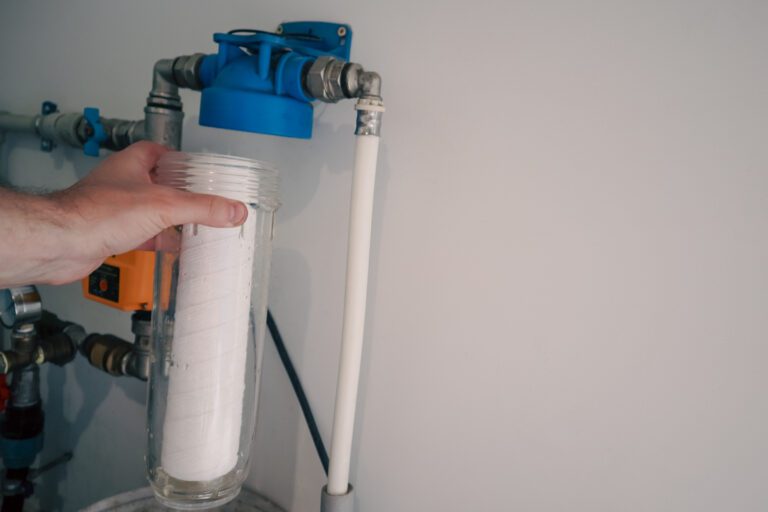
3. Clean the RO System Housing
- Remove Filters and Membrane: Take out the pre-filters, post-filters, and RO membrane. Be gentle to avoid damaging these components.
- Wash the Filter Housings: Use a mild detergent or the cleaning solution recommended by your manufacturer to scrub the inside of each housing. Rinse thoroughly with clean water to ensure no residue is left behind.
- Sanitize the System: Prepare a sanitizing solution (e.g., 1-2 tablespoons of bleach per gallon of water). Pour it into the empty housings and reassemble the system without the filters or membrane.
4. Run the Cleaning Cycle
- Turn the water supply back on and let the system fill with the sanitizing solution. Allow it to sit for about 15–20 minutes to disinfect the internal components.
- Open the faucet and flush out the solution completely, ensuring no bleach or cleaner remains in the system.
5. Rinse and Reassemble
- Remove the sanitizing solution from the housings, rinse them thoroughly, and reinstall the cleaned or new filters and membrane.
- Reconnect the RO system to the water supply and let it cycle through several tanks of water to ensure all cleaning agents are flushed out.
How to Change Filters on a Reverse Osmosis System
Over time, filters can become clogged with contaminants, reducing water flow and filtration efficiency. Follow these steps to properly replace the filters in your RO system:
1. Identify the Filters to Replace
An RO system typically includes:
- Sediment Filter: Captures large particles like dirt and rust.
- Carbon Filters: Remove chlorine, chemicals, and odors.
- RO Membrane: Filters out tiny impurities like dissolved salts and heavy metals.
- Post-Filter (Polishing Filter): Enhances the taste of water before it reaches your faucet.
Check your system’s manual to determine which filters need replacing and the correct order for installation.
2. Turn Off the System
- Shut off the water supply to the RO system.
- Turn off the valve on the storage tank to prevent water flow.
- Open the faucet to release pressure and drain any remaining water.
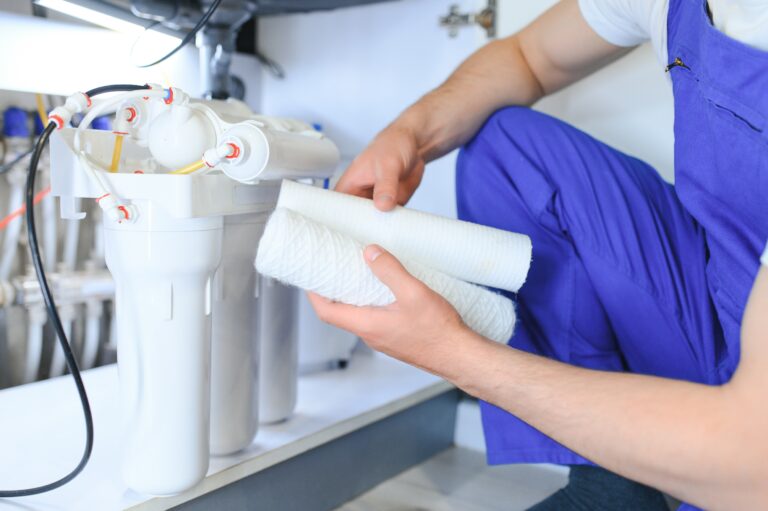
3. Remove the Old Filters
- Unscrew the filter housings using the wrench provided with your system or a compatible tool.
- Carefully remove the used filters, keeping them upright to avoid spilling trapped water and contaminants.
4. Clean the Filter Housings
- Wash each housing with warm, soapy water. Rinse thoroughly to ensure no soap residue remains.
- Inspect the O-rings for wear or damage and replace them if necessary. Apply food-grade silicone lubricant to the O-rings to ensure a tight seal.
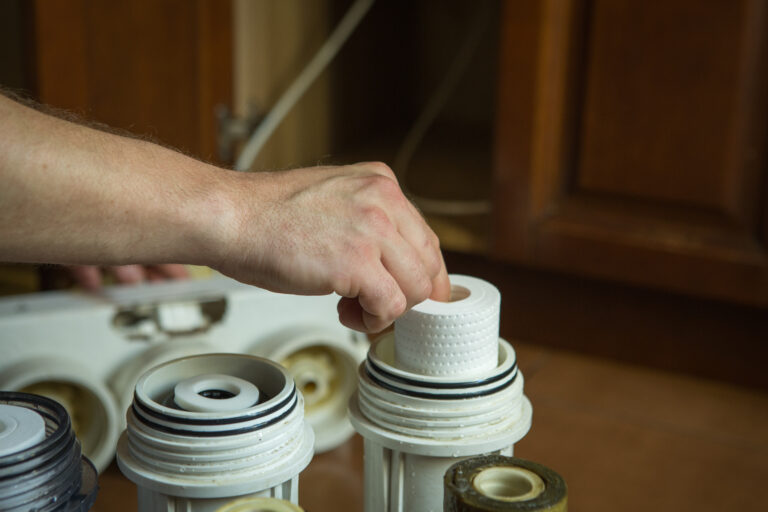
5. Install the New Filters
- Insert the replacement filters into the correct housings. Ensure they are properly seated to prevent leaks.
- Screw the housings back onto the system, tightening them securely but not excessively to avoid cracking.
6. Restart the System
- Turn on the water supply and open the valve on the storage tank.
- Check for leaks by inspecting all connections and housings.
- Allow the system to fill and flush it by draining the first tank of filtered water to remove any impurities or loose carbon particles from the new filters.
7. Record the Replacement Date
To stay on top of maintenance, note the date of the filter replacement. This will help you track when the next replacement is due.
How Often Should Reverse Osmosis Filters Be Changed?
To keep your reverse osmosis system running smoothly and providing safe, great-tasting water, it’s important to replace the filters on a regular schedule. But how often should you do it? The answer depends on the type of filter and how much water your household uses. Here’s a quick breakdown to help you stay on track:
1. Sediment and Carbon Filters
- When to Change: Every 6–12 months.
- Why It’s Important: The sediment filter catches dirt, sand, and other large particles that could clog the system, while the carbon filter removes chlorine, odors, and chemicals. If these aren’t replaced on time, they can become less effective and even damage the RO membrane.
2. RO Membrane
- When to Change: Every 2–3 years, depending on water quality and usage.
- Why It’s Important: The RO membrane is the heart of the system, removing tiny impurities like heavy metals, salts, and other contaminants. A worn-out membrane can’t filter as effectively, so replacing it on schedule ensures your water stays pure.
3. Post-Filter (Polishing Filter)
- When to Change: Every 12 months.
- Why It’s Important: This filter improves the taste and quality of your water right before it reaches your faucet. If you notice a change in taste, it’s a sign the post-filter needs replacing.
Pro Tip: Keep an Eye on Usage
If your household uses more water than average, or if your water source has high levels of sediment or minerals, you might need to replace filters more frequently. Always follow the manufacturer’s guidelines for your specific system.
How Do You Sterilize a Reverse Osmosis System?
Sterilizing your reverse osmosis system is an important step in ensuring it remains free from bacteria, mold, and other harmful microorganisms. Over time, the system’s components can harbor contaminants, especially if it hasn’t been cleaned regularly. Here’s a simple, step-by-step guide to sterilizing your system:
1. Prepare for Sterilization
- Turn Off the Water Supply: Shut off the water line feeding into the RO system and the storage tank valve.
- Drain the System: Open the RO faucet and let all the water flow out of the storage tank. This ensures there’s no residual water during the sterilization process.
- Remove Filters and Membrane: Take out the pre-filters, post-filter, and RO membrane. These components can’t be exposed to sterilizing agents like bleach, as it could damage them.
2. Mix the Sanitizing Solution
- Use food-grade sanitizer or unscented household bleach (about 1-2 tablespoons per gallon of water). Make sure to follow the instructions on your system’s manual if it recommends a specific cleaning solution.
3. Clean the System
- Add the Solution: Pour the sanitizing solution into the first filter housing (typically where the sediment filter goes). Reattach the empty housings to the system but leave the filters and membrane out.
- Flush the System: Turn the water supply back on and let the system fill with the sanitizing solution. Open the RO faucet until you smell bleach or sanitizer, then close it. Allow the solution to sit in the system for 15–20 minutes to disinfect the internal components.
4. Rinse Thoroughly
- After the solution has done its job, turn the faucet back on and let the system flush out all the sanitizer. Continue rinsing until the smell of bleach is completely gone.
- This step is crucial, as any residual cleaning agent can affect the taste of your water or damage the filters once they’re reinstalled.
5. Reassemble the System
- Install new or cleaned filters and the RO membrane back into their housings. Make sure all connections are secure.
- Turn on the water supply, allow the tank to fill, and flush the first tank of water to ensure everything is running smoothly.
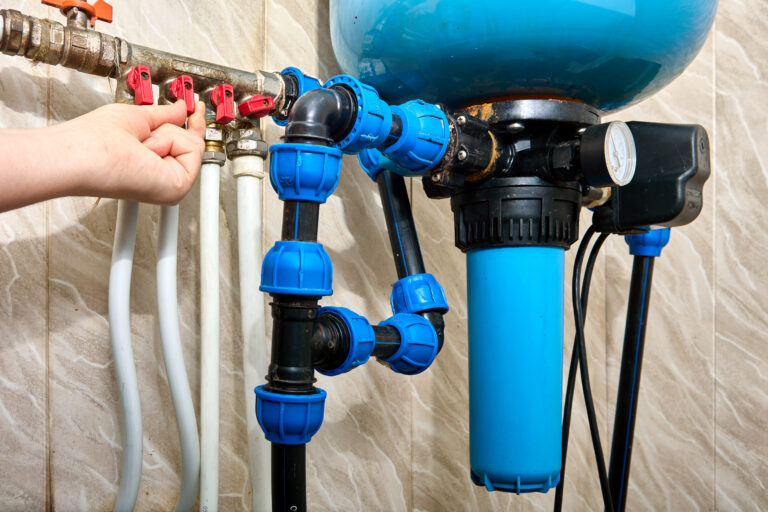
How to Clean a Reverse Osmosis Tank
The storage tank in your reverse osmosis system plays a crucial role in delivering purified water on demand. That is why when learning how to clean a reverse osmosis system, you’ve got to think of it, too. Over time, it can accumulate sediment, bacteria, or other impurities, so cleaning it regularly is essential for maintaining water quality. Here’s a simple guide on how to clean your reverse osmosis tank:
1. Prepare for Cleaning
- Turn Off the Water Supply: Shut off the water line feeding the RO system and close the valve on the storage tank.
- Drain the Tank: Open the RO faucet and let all the water flow out of the tank. You may need to pressurize the tank by gently depressing the air valve (located at the bottom or side of the tank) to push out any remaining water.
- Disconnect the Tank: Detach the tank from the system by unscrewing the tubing connected to it. Place it in an accessible area for cleaning.
2. Sanitize the Tank
- Prepare the Cleaning Solution: Mix 1-2 tablespoons of unscented household bleach with one gallon of water. Alternatively, use a food-grade sanitizer recommended by the manufacturer.
- Add the Solution: Remove the cap from the tank inlet and carefully pour the sanitizing solution inside. If the tank has a small opening, you may need a funnel for this step.
3. Let the Solution Work
- Reattach the tank to the RO system and turn the water supply back on.
- Allow the tank to fill with the sanitizing solution, then close the faucet and let the solution sit for 15–20 minutes. This allows the solution to disinfect the tank thoroughly.
4. Flush the Tank
- Open the faucet and drain the sanitizing solution completely. It’s important to rinse the tank thoroughly to ensure no bleach or cleaner remains.
- Fill and flush the tank with clean water several times until you no longer detect any smell or taste of the cleaning solution.
5. Reconnect and Test
- Reattach the tank to the RO system and check all connections for leaks.
- Turn on the water supply, allow the tank to refill, and flush out the first tank of water. Once the water runs clear and tastes normal, your tank is ready for use.
How Long Do Reverse Osmosis Tanks Last?
RO tanks are designed to be durable and long-lasting, but like any component of your water filtration system, they don’t last forever. Understanding their lifespan and knowing the signs of wear and tear can help you plan for a replacement before issues arise.
Most reverse osmosis tanks last 5–10 years with proper maintenance. However, the actual lifespan depends on factors like water quality, usage, and how well the system is maintained. Higher-quality tanks with better construction and materials tend to last longer. Investing in a trusted brand or manufacturer can save you money and hassle in the long run.
Signs Your Tank Needs Replacing
- Reduced Water Pressure: If water is coming out of the RO faucet at a trickle, the air bladder inside the tank might have lost pressure or become damaged.
- Leaking Tank: Any visible leaks are a clear sign the tank is compromised and should be replaced immediately.
- Persistent Odors or Bad Taste: If cleaning and sterilizing the tank doesn’t resolve strange smells or tastes, the tank’s internal lining may have degraded.
- Tank Doesn’t Refill Properly: If the tank isn’t holding water or refilling as it should, it could be due to an issue with the bladder or internal components.
When to Replace the Tank
If your tank is nearing the end of its expected lifespan or shows signs of failure, it’s time to invest in a new one. Fortunately, replacement tanks are widely available, and installation is straightforward. Make sure to choose a tank that’s compatible with your RO system and matches your household’s water usage needs.
How to Clean a Reverse Osmosis Membrane
The membrane is the core component of your system, responsible for filtering out tiny impurities like dissolved salts, heavy metals, and other contaminants. Keeping the membrane clean is essential for optimal performance and longevity. Here’s a step-by-step guide on how to clean a reverse osmosis membrane:
1. Know When to Clean the Membrane
- Performance Issues: If you notice reduced water output, lower water quality, or unusual odors and tastes, your membrane may need cleaning.
- Regular Maintenance: Cleaning the RO membrane every 6–12 months, or as recommended by your manufacturer, can help maintain its efficiency.
2. Prepare for Cleaning
- Turn Off the Water Supply: Shut off the water line feeding the system and the storage tank valve.
- Drain the System: Open the faucet to release any water left in the system.
- Remove the Membrane: Carefully open the membrane housing and slide out the membrane. Be gentle to avoid damaging it.
3. Choose the Right Cleaning Solution
- RO membranes require specific cleaning solutions depending on the type of fouling:
- Acidic Cleaners: For scaling caused by calcium, magnesium, or other minerals.
- Alkaline Cleaners: For organic fouling like bacteria, mold, or biofilm buildup.
- Check your manufacturer’s guidelines for the appropriate cleaner to use.
4. Clean the Membrane
- Prepare the Cleaning Solution: Follow the instructions on the cleaner to mix the solution with water.
- Soak the Membrane: Submerge the membrane in the cleaning solution for the recommended time (usually 30–60 minutes). This helps dissolve and remove buildup.
- Rinse Thoroughly: After soaking, rinse the membrane thoroughly with clean water to remove all traces of the cleaning solution.
5. Reinstall the Membrane
- Insert the cleaned membrane back into its housing, ensuring it’s properly seated.
- Close the housing tightly and reassemble the system.
6. Flush the System
Turn the water supply back on and let the system run for several cycles to flush out any residual cleaning solution. Discard the first tank of water to ensure no traces remain.
When to Replace the Membrane
Even with regular cleaning, RO membranes will eventually wear out. On average, membranes need to be replaced every 2–3 years, depending on water quality and usage. If cleaning no longer improves performance, it’s time for a new membrane.
Maintaining a reverse osmosis system is crucial for ensuring your household has access to safe, clean, and great-tasting water. From cleaning the filters and membrane to sanitizing the tank and replacing components on time, proper care keeps your system running efficiently and extends its lifespan. By following the steps outlined in this guide, you can confidently take care of your RO system and enjoy pure water every day.
If you’re looking for expert maintenance for reverse osmosis systems in Bucks County, trust Water Logix to handle the job with care and professionalism. Whether it’s routine maintenance, troubleshooting, or a full system checkup, our team is here to help.
Contact Water Logix today to schedule your service. Clean water starts with expert care!